Recommended TOOLS
- 12″ screwdriver, Phillips #2
- a medium sized suction cup or a couple of small ones
- something soft to place on your repair area
- a heat gun
- a work light or stand-up flashlight
Please read the entire guide before starting. Overall, this is an easy repair. There are some gotchas along the way, though!
In early 2021, my left-side IN-8 started exhibiting a strange buzzing. Worse yet, by just a couple of months, I was outside of my 1-year warranty. Fortunately, the nice folks at Kali took care of me and supplied a replacement mid/tweeter assembly for practically nothing. Unfortunately, the repair was not as plug and play as I thought it would be. Fear not! With this guide, you will benefit from my experience and have a much easier time than I did.
Unplug all cables, and bring your IN-8 over to a nice, well-lit table. I recommend laying it over something like sheets of newspaper, a towel, etc.. The idea is to prevent scratches to either object. Now, remove the 8 screws securing the back panel. In this official Kali video the man Charles himself will show you how:
Though the video above is for the LP-8, the screw locations are quite similar for the IN-8. I didn’t have luck simply pulling up on the panel as Charles does. My IN-8 seems a super tight fit. I was lucky enough to have a suction cup handy.
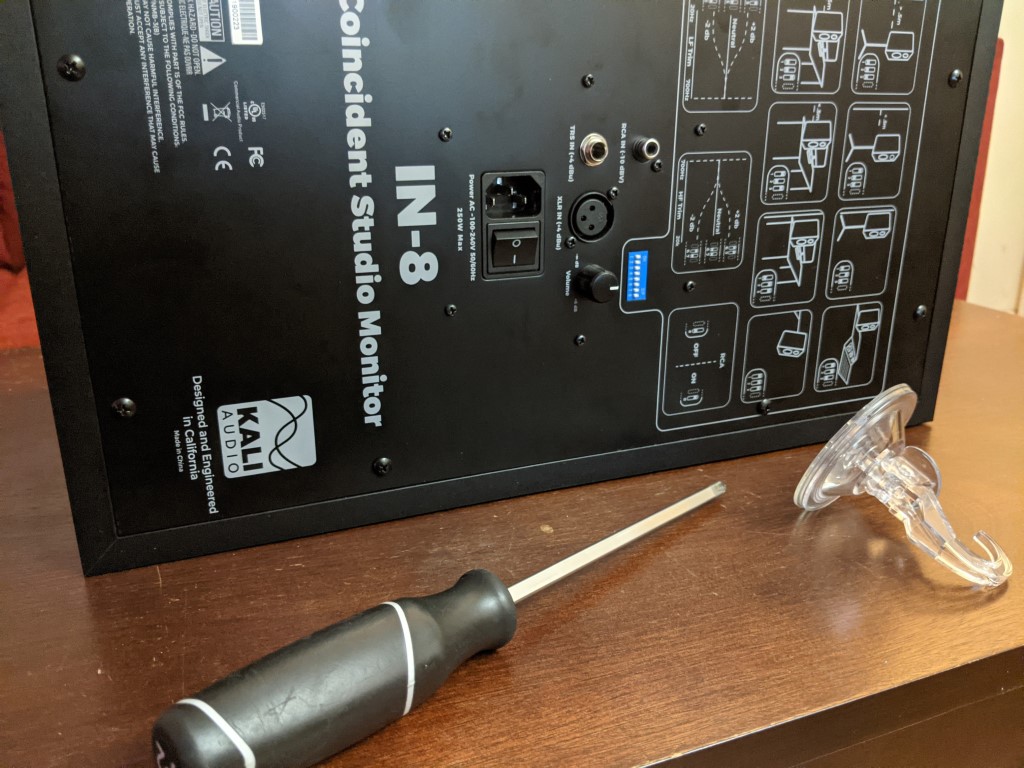
It is NOT necessary to remove any of the screws in the middle surrounding the power cord and all the inputs.
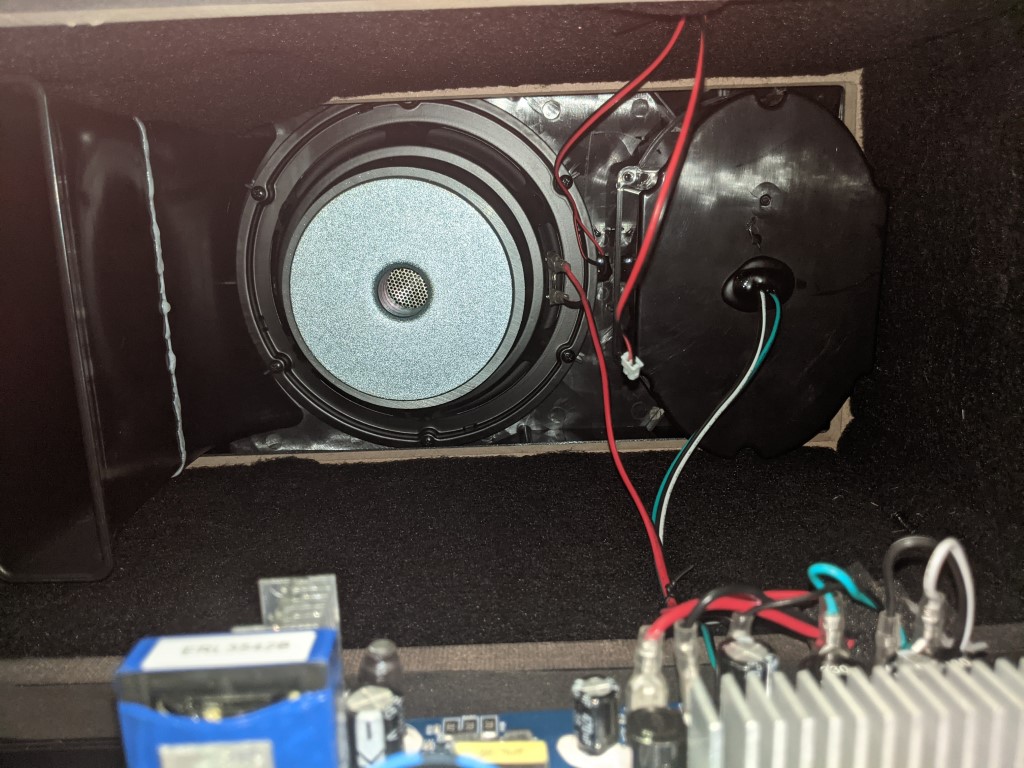
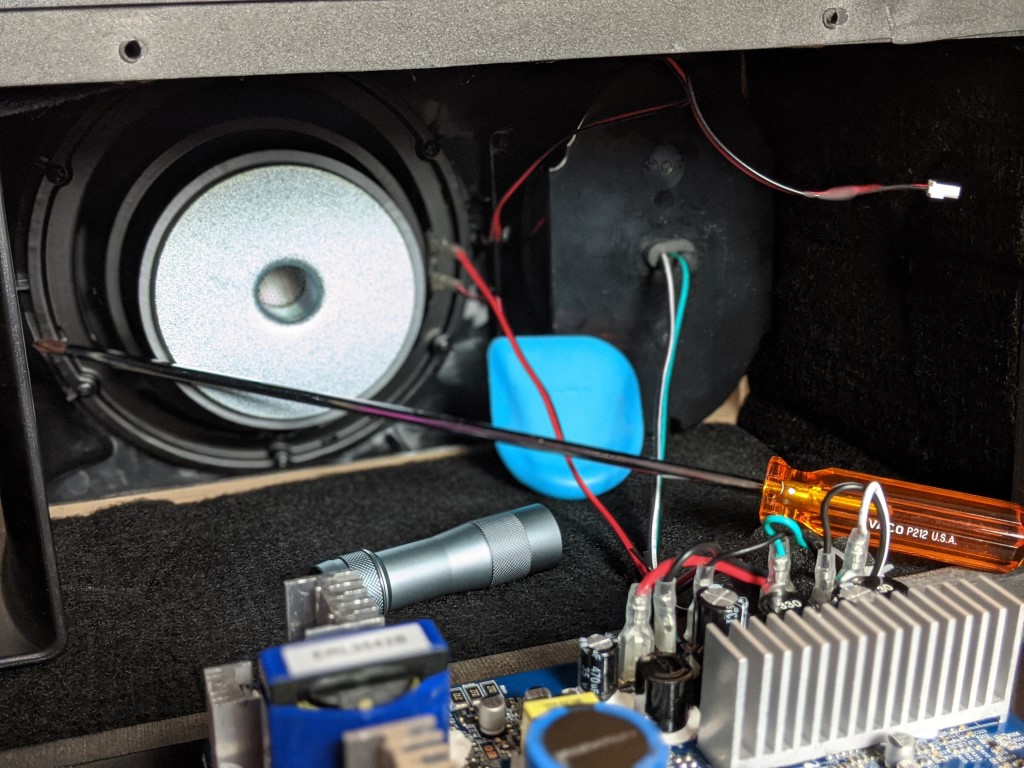
Once you have the rear panel off, don’t forget to remove the LED wire as Charles showed above, and very carefully let the panel down. Once again, have something soft underneath so you don’t scratch anything or damage the volume knob. The next step is removing the plastic baffle that houses the mid/tweeter assembly. Since the IN-8 has such a deep cabinet, shining a light into it while you work is helpful. A cool LED work light or a stand-up flashlight will do quite nicely.
Here we encounter our first gotcha. Though it is possible to remove those six screws with a shorter screwdriver, I highly recommend using a 12″ #2 Phillips, like this one:
You may also have luck purchasing such a screwdriver at an auto parts store. The reason you will need it is that replacing the screws will be quite a knuckle-buster with 4 of the 6 screws being so close to the edge of the cabinet. The screwdriver handle itself will get in the way when using a shorter screwdriver. Once you have removed the screws, the next challenge awaits.

See that black goop where the 2 wire pairs enter the baffle? It needs to go! You cannot just remove the wires at the amplifier side. That won’t give you the slack you need. I chose to heat up the goop with a heat gun, then gently scrape it off with a putty knife. Be VERY gentle at the center, where the wires are. There is a rubber grommet there that you definitely don’t want to damage, not to mention you don’t want to nick the wires themselves.

Get the goop off! Once you have also removed the remove the grommet, you will be able to pull the baffle back and gain enough clearance to remove both of the mid/tweeter wire pairs. Removing the grommet will also let you pull the baffle completely out and give it a good cleaning with Goo Gone or a similar solvent.
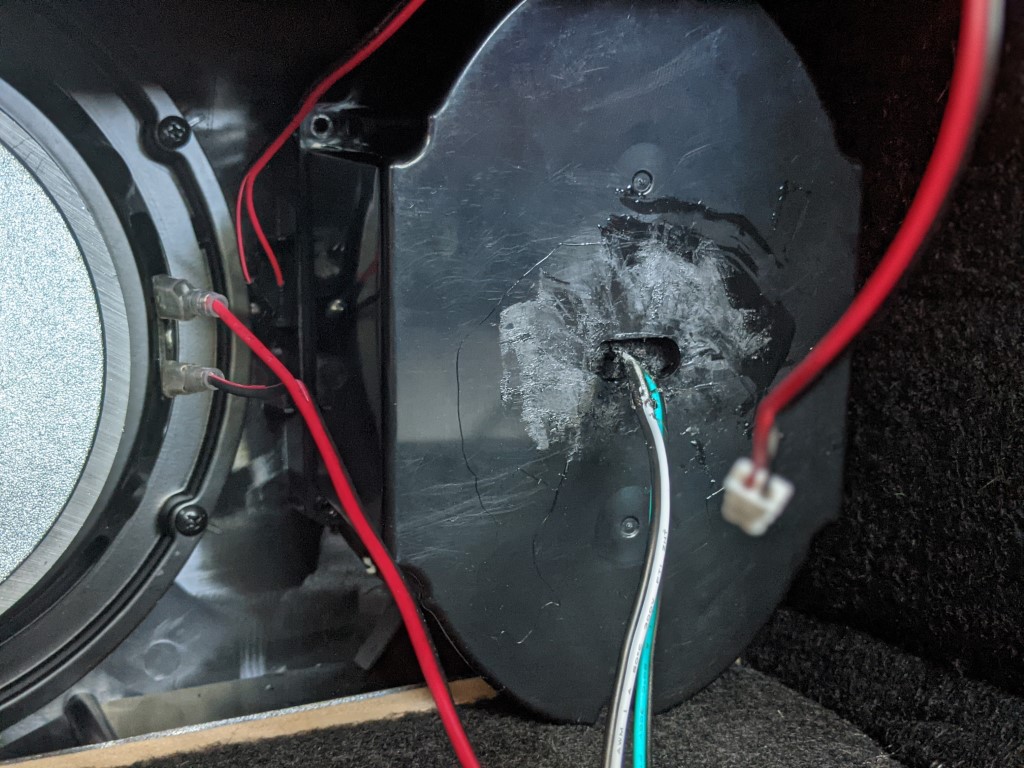

Before you remove the speaker leads, here are some reminder shots of where the colors go:

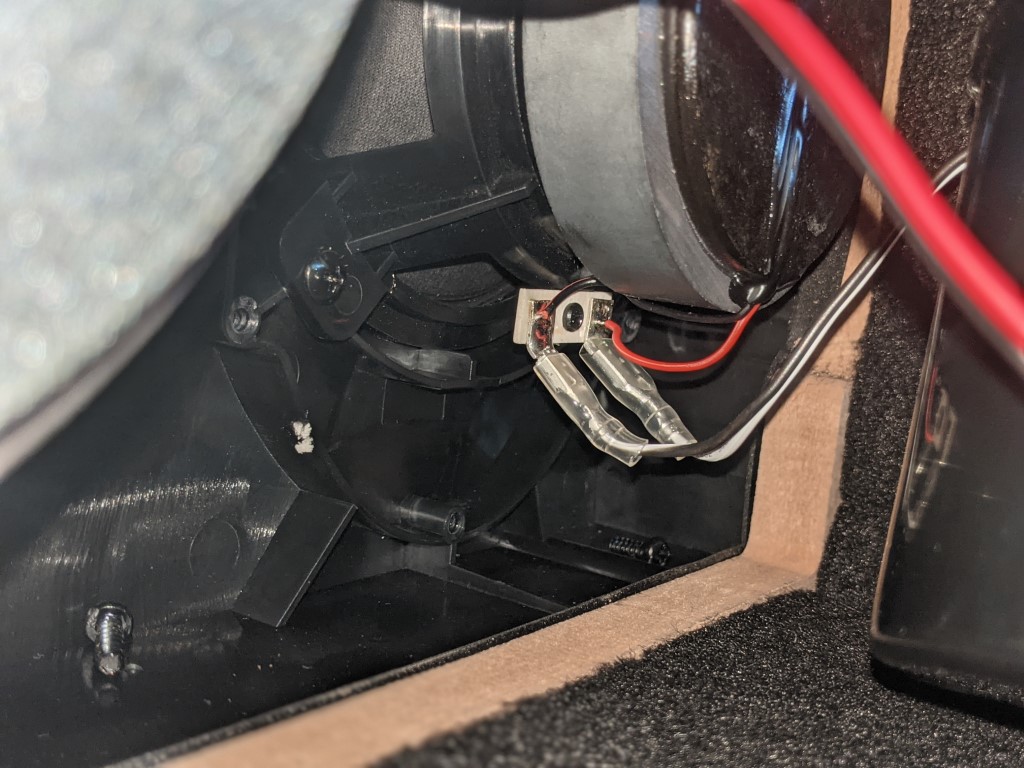
DO NOT simply yank the wires from their posts! These are fast-on connectors that must be pressed to remove. There is a latch release on the connector that you push to release. So squeeze, then pull. If you’re doing it right, you should NOT be pulling with any reasonable amount of force. They should slide right out.
Once both pairs are removed, remove the four screws holding the mid/tweeter assembly in place. Remove the old assembly. Phew! At this point, you are pretty much ready to pop in your replacement mid/tweeter assembly and reverse the removal steps.
Screw your new mid/tweeter assembly in place. Fish your wires through the plastic baffle. Re-attach all wires to the mid/tweeter assembly. Replace the rubber grommet. This step can be tricky. I found it useful to jam the bottom edge in first, then use something stiff (like the blue, plastic scraper below) to push the top of the grommet through. If you are really adventurous, you could probably re-heat the goop and trowel it back on again. I chose not to do so as I find the rubber grommet substantial enough to prevent any wire movement.
Almost there! Now you can replace the plastic baffle. This is where the 12″ screwdriver REALLY comes in handy for those screws at the edges.
After replacing the baffle, don’t forget to plug back in the LED wire as you lift the back panel up. I recommend you replace the back panel with the speakers face-down. This will help you screw it back down evenly. Again, put something soft underneath so you don’t screw up your new drivers!

Now go have a beer or treat of your choice. Happy listening!